


Migrate from WordPress to Webflow: Step-by-Step Guide

This guide will not represent your exact WordPress setup and its migration path since every WordPress installation is unique - through its use of themes and plugins that help bring the site to life.
It is meant to help provide a direction; acquaint yourself with the terminologies, nuances, gotchas, and trade-offs involved; to help you feel more confident with your decision-making.
The choice of a more optimal platform will determine your website’s trajectory, and by extension, your business’ too. It will significantly affect how and to what intensity does your company assign resources to it, how often, and how many headaches the company or the digital team experiences.
There is no right or wrong choice. It’s about the requirements and the most optimal and effective solution for your business. Our goal here is to aid in that.
This guide comes from our personal experience of working with WordPress exclusively for several years (pre-FSE era) and in the recent years, migrating many WordPress sites, of different shapes and sizes, to Webflow.
Note: The information mentioned in this article is as of our understanding of the current (at the time of writing this) architecture and features offered by both platforms. Features and techniques may change over time, and while we will attempt to update the article as things change, we’d recommend doing your due diligence too.
Difference between Webflow and WordPress
You can think of Webflow v/s WordPress similar to Mac v/s Windows respectively. Due to their fundamental nature and architectures, they have different advantages and pitfalls.
Webflow
Just like a Mac, Webflow is a custom platform, not openly distributed to be installed as a software on any server, but a proprietary tool only offered on their hardware.
This gives you a tight-knight, well-built, thoroughly tested software that is focused on ease-of-use, pre-configuring things (making technical decisions) on your behalf, protecting you from malwares, and offering this entire service as a subscription package.
It comes with a trade-off of potential limitations for your use case, and giving up the majority of control over technical decisions.
The platform can be extended by connecting it with third-party applications, and some additional on-site features via their App marketplace.
WordPress
WordPress, like Windows, is a distributed software to be set up on servers and configurations (systems) of your choice.
It gives you choice of your own servers, its setup and configuration, modifying WordPress to your liking and use case, and an open platform to install an extension software (plugin) of your liking. You have full access to the underlying codebase and database.
So here, you get more variety, power, and freedom, but at the expense of complexity, malware/virus exposure, and higher chance of system crashes.
What Webflow can be used for
Webflow is simple to use and quick for marketing websites, but if your goal is to build something that resembles more of a web app – like complex forums, membership sites, social networks, directories – you need to weigh the respective trade-offs.
It is possible to build many of these with Webflow, but not just with Webflow alone, i.e. you have to put multiple 3rd party solutions together, and all of them will need to be configured correctly and work in sync in order to achieve the desired functionality.
So, the success of its implementation then depends on your service provider – the developer – and their ability to identify and break-down feature complexity, past experience with the 3rd party tools (same or similar ones), and judgement of the involved trade-offs.
This gets into the realm of no-code.
No-code tools come with their own upsides and risks.
Upsides of no-code tools
- Easy to use
- Secure
- Quick to implement, update, maintain
Risks/Trade-offs with no-code tools
- Monthly subscription costs
- Software startup going out of business
This is different than WordPress plugins. If WordPress is like a machine, then WordPress plugins are built to fit within and extend that machine, whereas the low-code tools are like separate instruments to be orchestrated to work in sync by the developer. So, the developer’s role, ability, and decision-making becomes very important here.
Summary:
Want to migrate a Marketing website? Choose Webflow confidently without worrying much. Have some complex functionalities or something resembling a web app? Will need a thorough inspection of the trade-offs to make a decision accordingly.
Difference between Webflow and WordPress
Advantages Webflow has over WordPress
All the subpoints below compound into an overall experience that can differentiate between smooth sailing and frequently occurring frustration.
Secure (Hack-proof)
Webflow
Webflow doesn’t have any directly exposed backend systems or open-source code. Your website is a static package hosted via AWS with no direct backend entry-points to exploit.
Sure, being a multi-tenant application, it does have its backend setup and systems, but it’s closed-source, and goes through strong security checks and periodic routines (more specifically - pentesting and certification from an external security agency every 6 months, besides regular security checks and updates; find details here).
There are some frontend vulnerabilities possible, like XSS or CSRF via frontend forms (a potential vulnerability for any web application or site), but those systems are in regular monitoring and has security defences in place.
A Webflow site cannot be directly hacked individually at the system level, unless you somehow give your Webflow login details to a hacker. This is similar to how a hacker cannot hack your individual Facebook or Google account.
WordPress
WordPress being a software that you manually install on a server opens up vulnerabilities at multiple levels for an individual:
- Server misconfiguration
- Core vulnerabilities
- Plugin vulnerabilities or trojans (plugins intentionally built and distributed as malware) - the most common
Being such a popular open-source platform being used on billions of websites has both its advantages and disadvantages - it’s amongst the biggest targets for hackers, and there are tons of white-hat security researchers and teams working specifically full-time to monitor and save the platform from exploits.
Historically, if we look at statistics of the last 3 years, there have been over 7,000 vulnerabilities in 2022, 10,000+ in 2023, and over 15,000 in 2024 in the entire WordPress ecosystem. The vulnerabilities usually target free plugins and themes, and often include popular names that majority websites use. Here’s the entire historical log of WordPress vulnerabilities - https://wpscan.com/statistics/ - a project put together by Automattic, the parent company who created WordPress.
Easier to use
With Webflow, you get everything ready to build and launch. A GUI that builds exactly as you see in the designer. Other options easily configurable via website settings, all options readily available. What’s not there is a thing that you cannot control; simple as that.
This doesn’t mean Webflow sites can’t have complexity. CMS’ (database) can potentially have a learning curve, depending on your use case, requirements, and how it was set up by the person building the site. Though, this is the highest level of software abstraction without losing total control over data structuring and management so, it is inevitable.
Contrast that with WordPress, where you have tons of options for every requirement - whether related to look (themes) or functionality (plugins).
No Hosting Headaches, Broken Sites, or Downtime
A major decision that you have to make with WordPress even before building your website is - where to host your site. There are lots and lots of companies providing WordPress specific hosting, some authentic, while some others making shady marketing claims, not coming through in practice.
This is further exacerbated by the affiliation system. Most hosting companies provide affiliate income on getting new customers to sign up with them. This means many blog articles that you may see and read recommending WordPress hosts may be incentivized by just the money part, without thoroughly testing and stating their authentic experience about the host. This is a common practice in the WordPress ecosystem, one that we have personally seen shape up over time, along with their consequences.
A poor choice of host would mean frequent downtimes, especially when your website traffic sees a spike (more visits from people in a short duration).
Combine that with frequent cache misconfigurations and problems (discussed in the next point) and hacking vulnerabilities, you’ve opened your organization to a plausible probability of your brand reputation taking a negative hit in such a situation; potentially losing visitors’ trust, and/or even customers.
Webflow being a service that offers hosting as a part of its package, and a guaranteed uptime (along with a solid record of over a decade), you minimize that potentially-hurting probability into a rare possibility.
Inbuilt CDN
On top of integrated hosting with high uptime, Webflow also provides global CDN, at no additional cost, from Amazon AWS and Fastly. These are the same services that power the majority of the internet and your favourite apps (Uber, Spotify, Netflix, etc.). You don’t have to pay for and configure a custom CDN for faster websites.
No Cache Problems
WordPress users categorically have 2 long-standing issues related to caching – choosing a proper caching mechanism that fits your hosting setup, and effectively clearing up to serve updates to the site visitors.
First, choosing an optimal caching plugin is a long trial-and-error process by itself. Many WordPress specialised hosts come with their own cache plugins pre-installed or with recommendations, but may not be fully configured. Other times, you have to search and try multiple of them before you end up with an optimal one… until it breaks something and you’re onto the search for the next.
This has been my personal experience over 5 years of actively using WordPress - starting with WP Super Cache, jumping to W3 Total Cache, to WP Rocket, to WP Fastest Cache (used for a significant time), jumping to Super Page Cache for Cloudflare, and then onto Lightspeed Cache. More cache plugin jumps than the number of years spent actively using WordPress…
In this entire duration, things frequently broke. Either some site parts weren’t showing updated content, or configuration problems would cause the site to appear broken (as CSS and JS asset links would break). And I wasn’t the only one. You’ll see plenty of forum posts and cache guide comments complaining about site break and anxiety surrounding caching.
With so many server setup combinations with your hosts, some functions may work or make sense for some setups, but not for others - things like Memcaching, Redis, Object Cache, etc. It’s such a common configuration issue that you’ll see tons of guides telling you how to set up different WordPress caching plugins, many of them suggesting different setups for the same plugin.
TLDR; Something as fundamental as caching is a complex mess with WordPress, because of the sheer configuration possibilities of your setup.
Nothing like this exists at all for Webflow. As it is a simple static site on the frontend, it is cached as expected, automatically, and correctly flushed when you publish an updated version (including the dynamic parts like CMS and server redirects). Your latest website updates delivered to your visitors instantly; no grievances or issues, still maintaining all the performance benefits of caching your site.
No Periodic Manual Software Updates or Plugin Complexities
Third-party WordPress plugins may or may not be built up to the high coding and security standards. Even if they are, it still risks vulnerabilities with different versions of WordPress and other plugins. As we saw before, WordPress plugins are the most common targets for hacking WordPress websites.
And to ensure your site stays updated with all the latest security patches of WordPress and its plugins, you have to regularly login to the dashboard and run the updates manually. Only after updating will you know if there’s any clash between any of the plugin combinations that you have installed, and if they do (which is a common occurrence), the website breaks. Surprise!
To help mitigate this, many hosts provide a separate staging environment to test the updates and then roll to your live site. More busywork to do, which has no direct relation to or have a positive impact on your website or business.
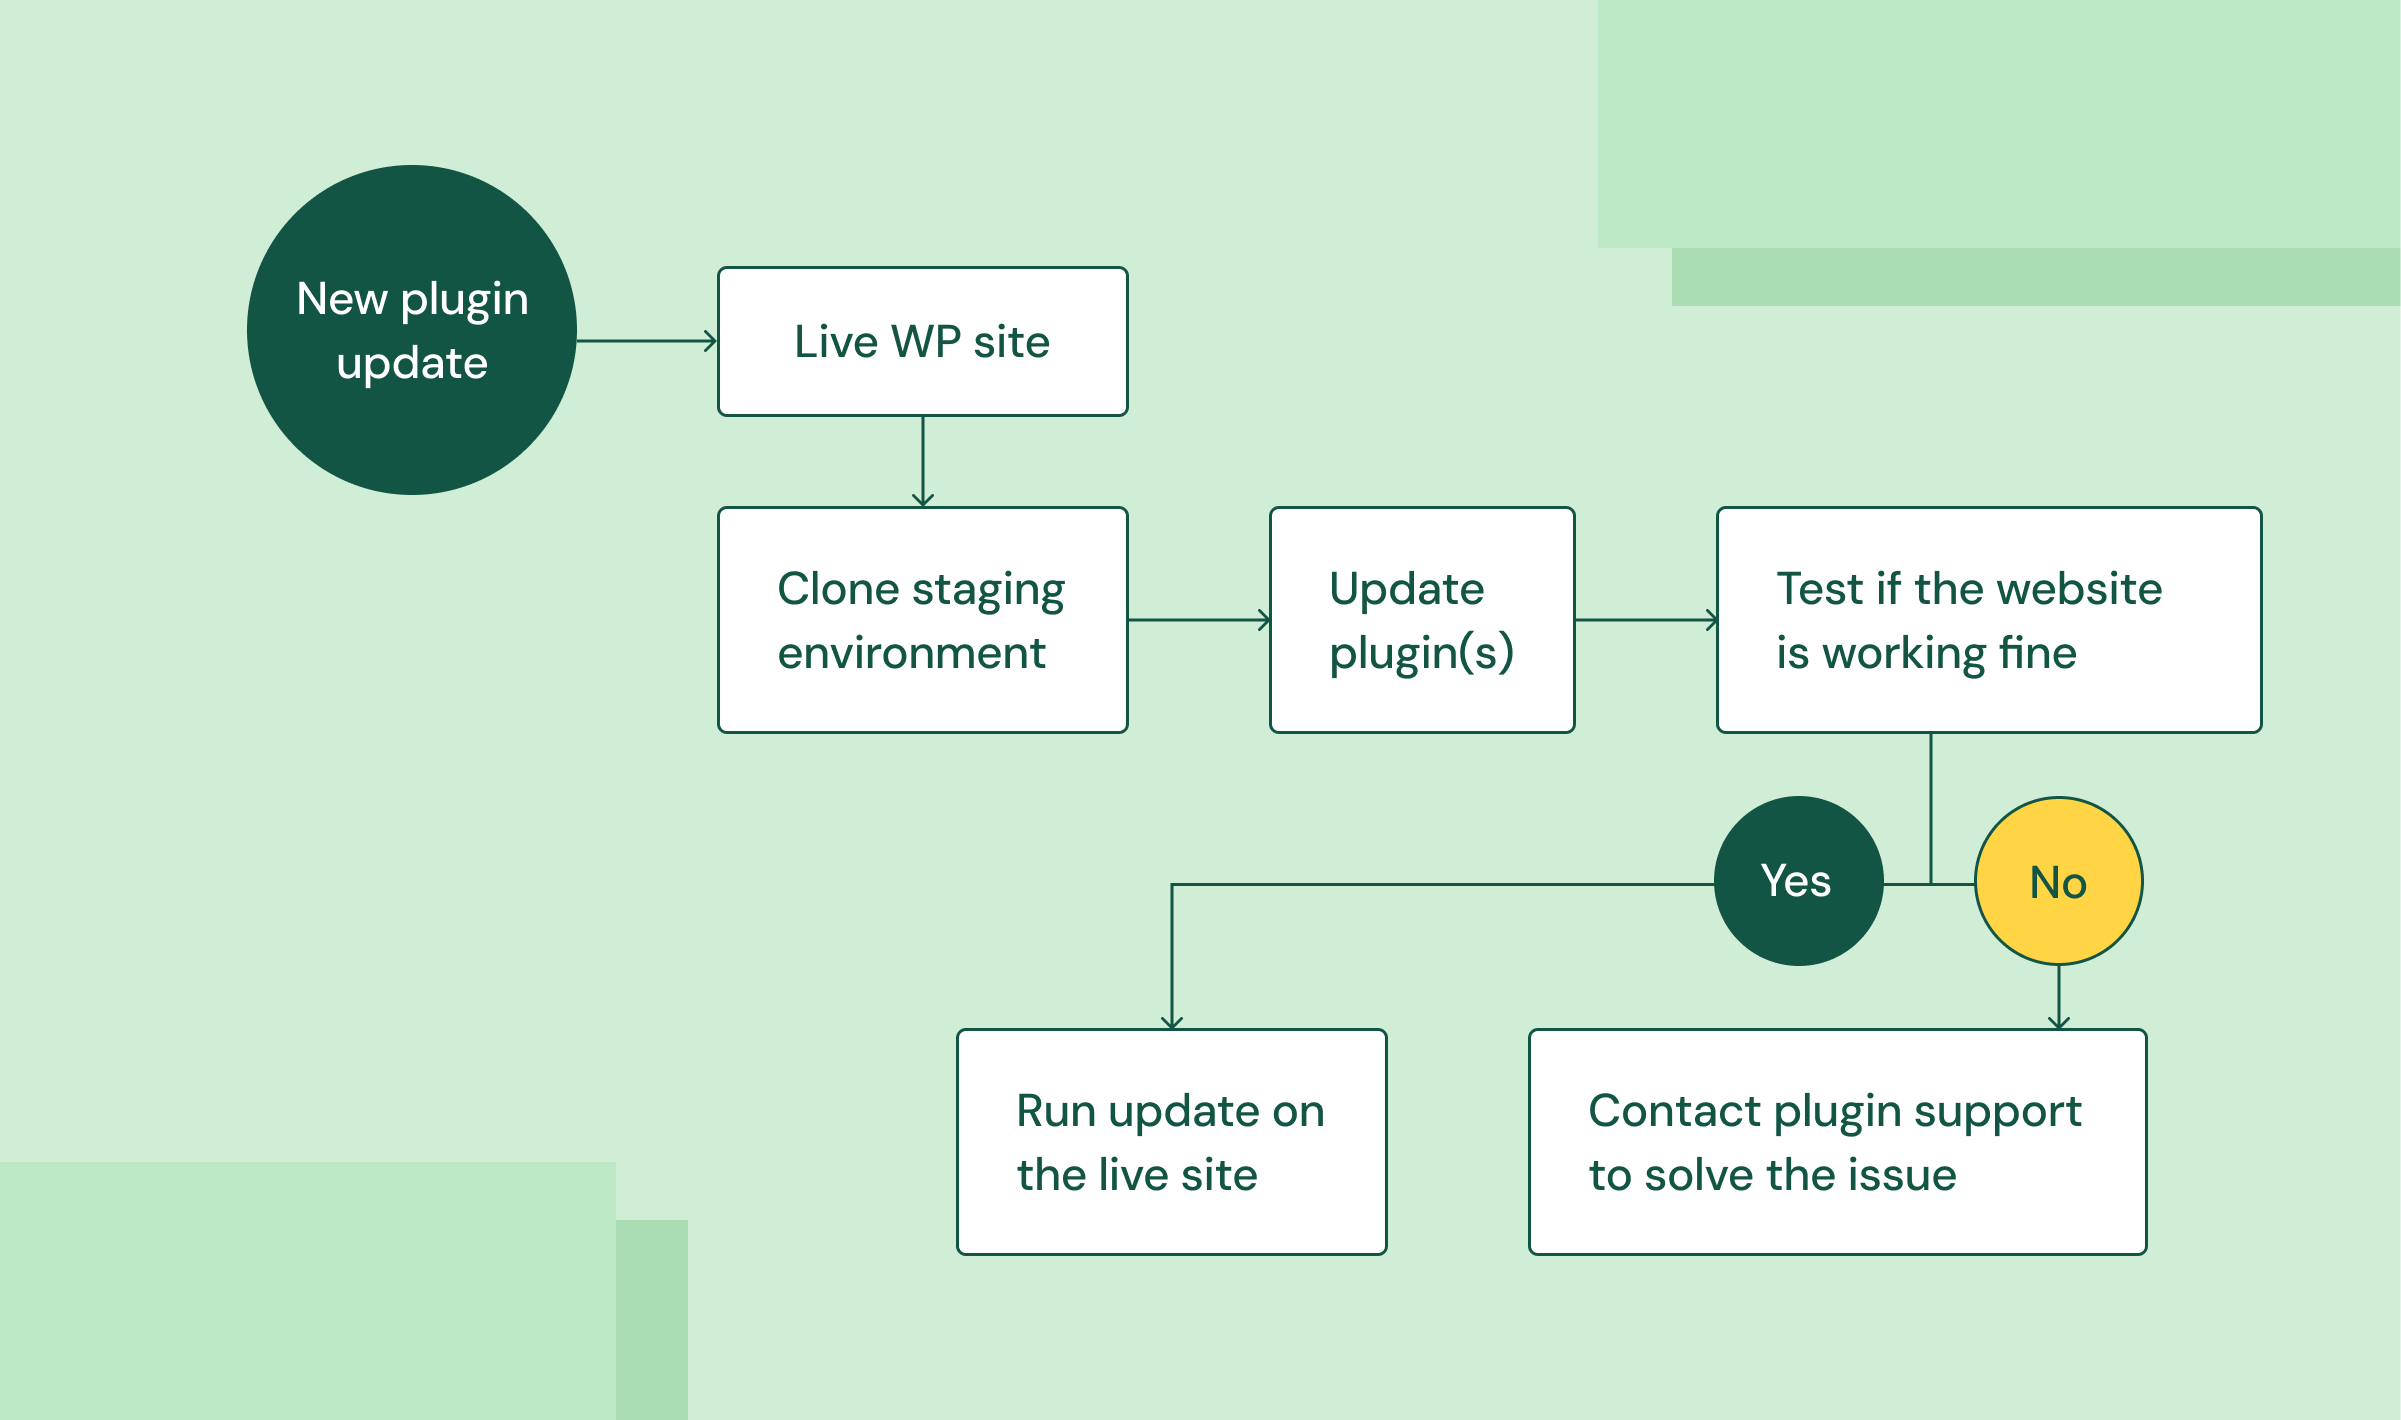
This is where a significant amount of time of an in-house or external WordPress dev goes - maintaining your WordPress site just so it won’t break. That is where you spend a significant amount of your money, or time, or both.
None of these complications or problems exist with Webflow. No plugins, no manual updates to do, no compatibility clashes, no site breaks. Simple.
Trade-offs with Webflow
It’s not all roses. If your requirement is simple and straightforward, you may likely have an amazing experience with Webflow. But oftentimes, there are features that a website needs that may not be natively possible with Webflow. That’s a trade-off that you buy into.
Remember that Webflow is a software provided as a service. So naturally, even if they can, they won’t build everything that your particular project needs, as they have their own vision of what the Webflow software is supposed to be and how it shall work. A software needs to balance feature-set, complexity (both end-users’ and technical debt), and many more aspects and align it with their long term vision.
There are over 1700 requests in their wishlist board as of April 2025. Although most are reviewed, and many have 3rd party solutions, there are a few critical ones that may either come later or never see the light of the day. And it doesn’t matter if it comes later when you have to build and launch your site today. So, you’d have to opt for workarounds in such cases.
Webflow has a helpful forum, and chances are, somebody might have come across the limitation that you too have a requirement of. So, if you’re building the site yourself with Webflow, it would be helpful to first search around to see if the platform supports everything that you’re looking for.
If you want to get the site built by a professional Webflow dev team, they may have experience and know-how about most requirements that Webflow may/may not support, and workarounds for them.
Some commonly faced tradeoffs:
- CMS Nesting limitations
- Site search customization inability
- No server side logic execution ability
- Custom/large assets upload
- Inability to extend the platform much to your liking besides 3rd party solution - somewhat possible using their API
Some uncommon tradeoffs:
- Hosting location
- Ecommerce feature-set
Summary of differences between WordPress and Webflow
Content Migration
Content in WordPress can be added in many forms:
- WordPress native post types
- theme/plugins created Custom Post Types (CPT)
- usage of plugins like Advanced Custom Fields / Pods to create your own CPT schema.
Aside from the WordPress native Posts and Pages, custom post type examples may include - Forms, Documentation, Design Templates, Redirects, etc. (most of them created by plugins that you install).
Overall steps to migrate content from WordPress to Webflow:
- Identify content/CPTs to migrate
- Export data from WordPress as CSV
- Create appropriate CMS setup in Webflow with respective fields
- Preparing the data for import - format the exported data to match the structure and data-types that Webflow needs
- Run the import
- Fix/facilitate anomalies or unsupported content manually
- Correct URL paths using 301 redirects
Tip: Keep your WordPress site live while you go through the migration process. This way, importing images will become easier. Otherwise, they’ll need to be uploaded to some publicly accessible cloud storage for Webflow to auto-import images.
1. Identification of Content to migrate
There are 2 ways to identify that:
- Is it an area that allows you to add new items?
- Does it look similar to where you add Blog Post/Pages?
Some plugins may alter the view of the post add screen interface to make it look differently, but if you’re adding in new content there, it’s most likely a custom post type.
You can think of them as databases, or what Webflow calls “CMS Collections”.
Note: Not all post types may make sense as a database and may require a different approach to the feature. E.g: Forms, Design Templates. If it isn’t a direct article form of content, it’ll fall under this other category whose data or functionality migration depends upon its use-case.
After you identify all the content sources you want to migrate, then look for the following parameters:
- URL Structure, i.e permalink format
- Type of Data structure, i.e. the schema of your post type
- Do we have any complex data structures like Repeater fields?
- Format and flow of data structure
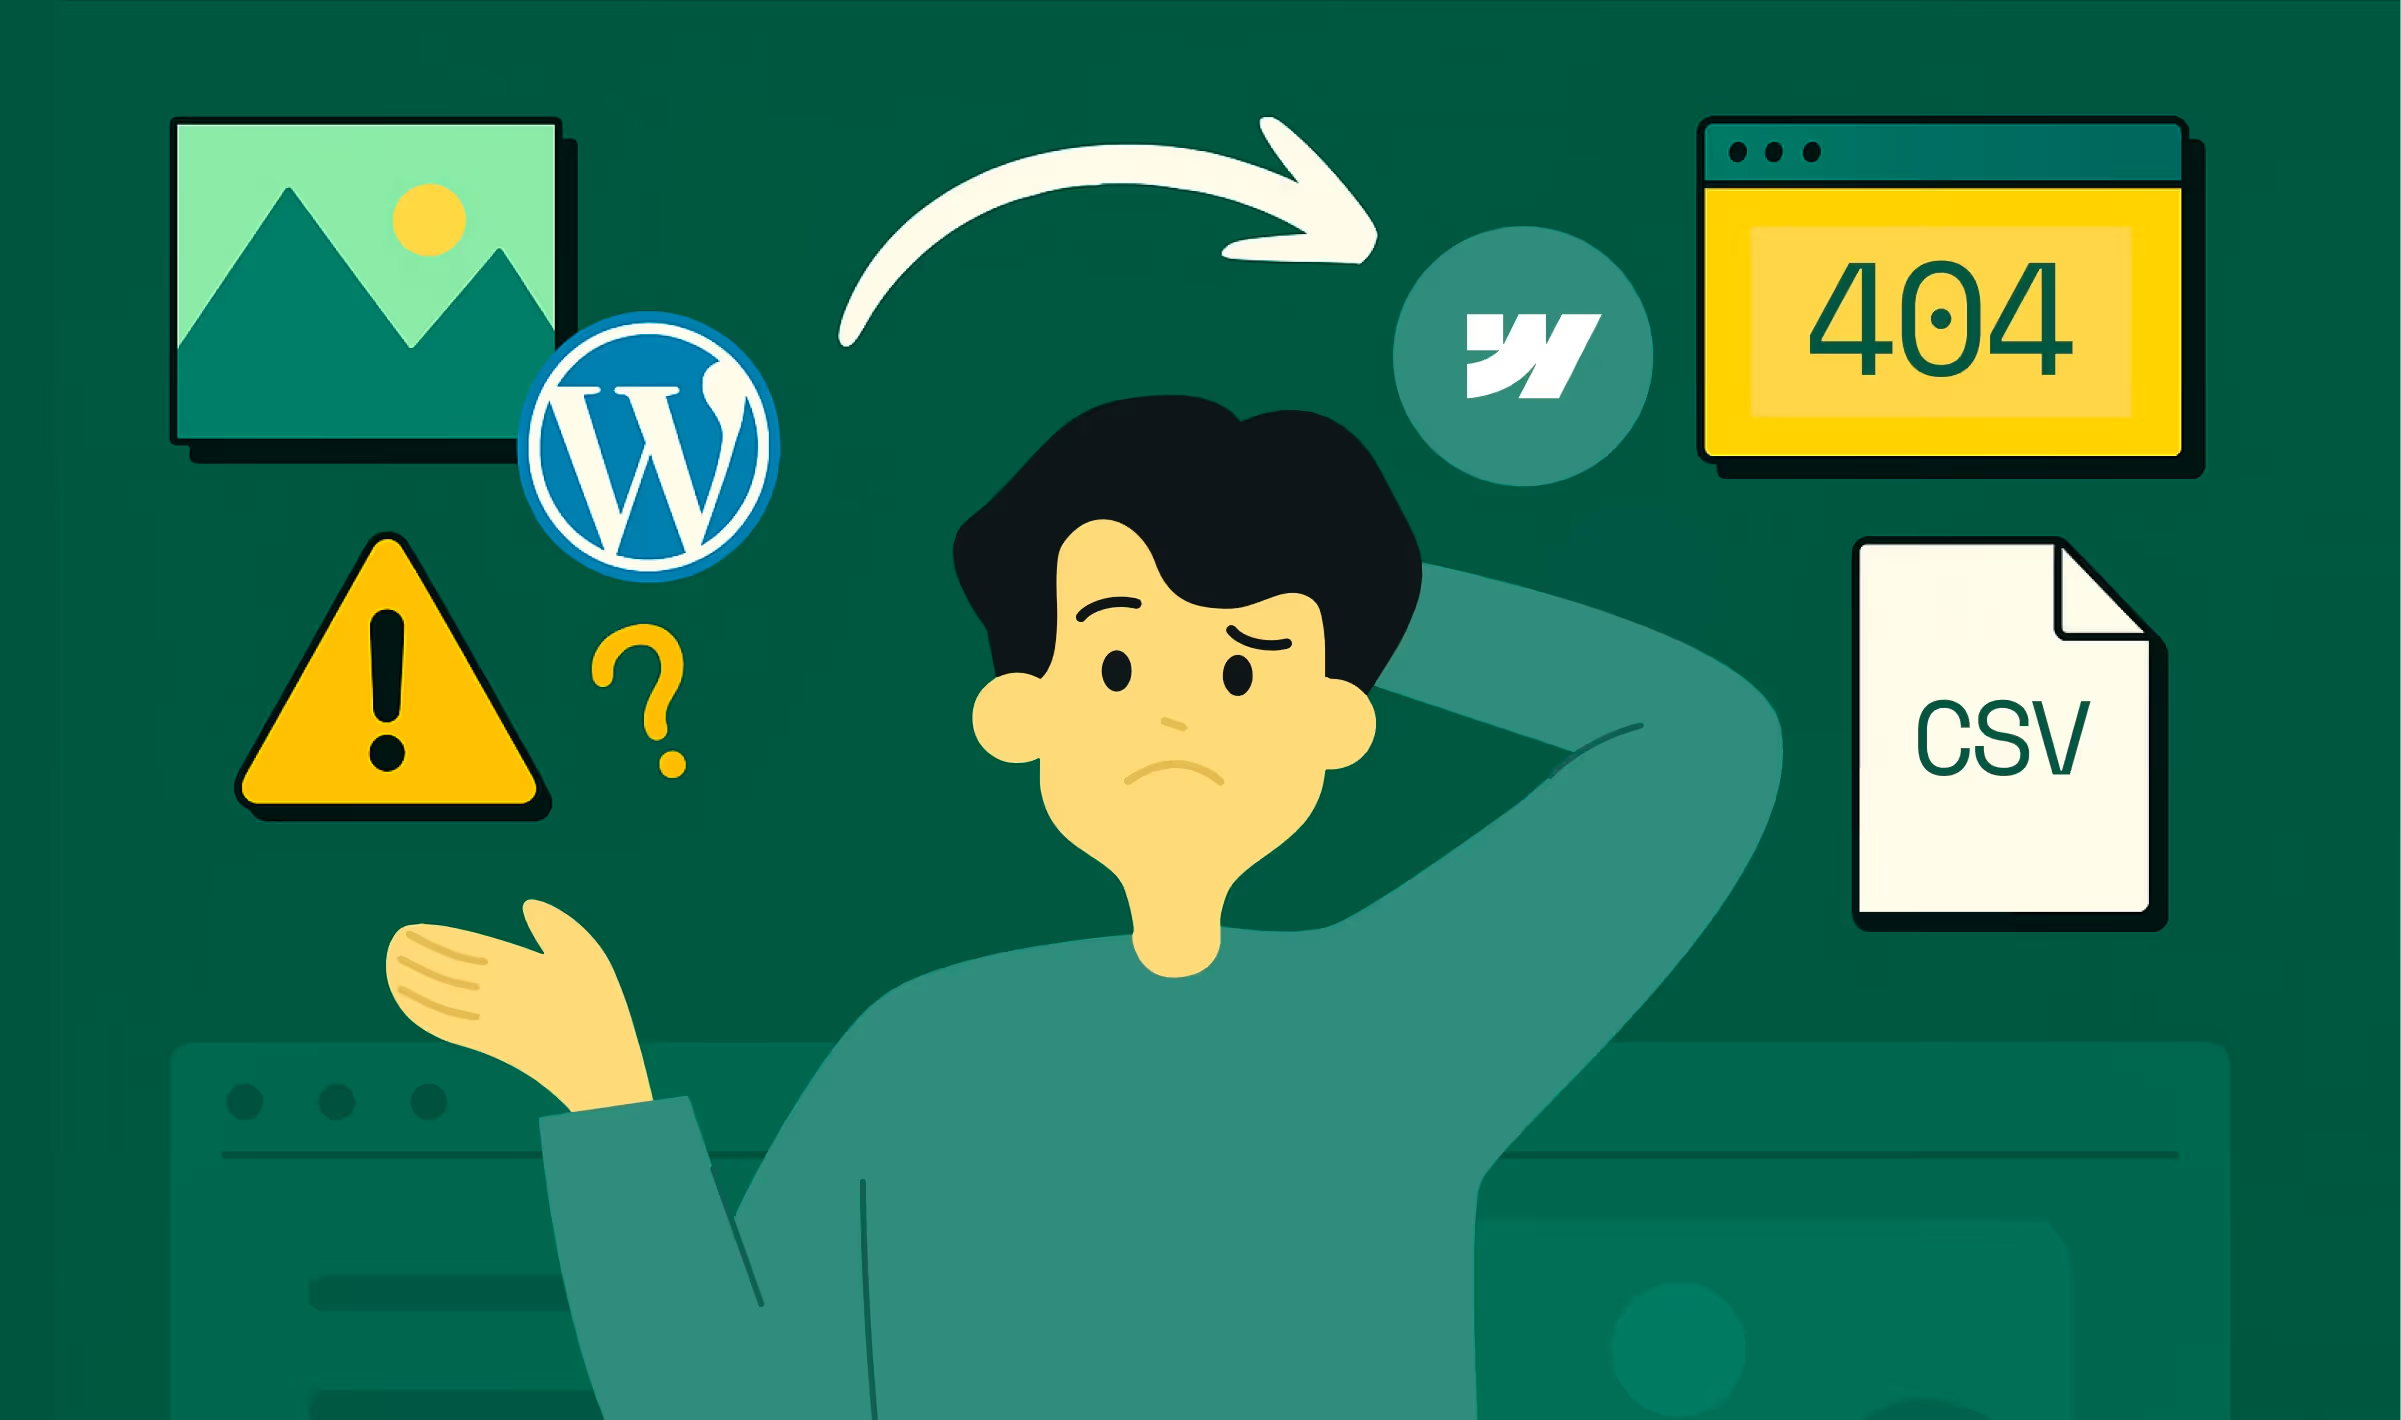
Types of Content not directly supported in Webflow
The following are some content types that would need a different database structure approach to migrate, and would hence change the way you interact with it in the new platform:
- Repeater fields - fields that allow you add or more groups as needed
- These may be used in WordPress as a part of your theme/ACF (Advanced Custom Fields plugin) setup for repeating content like cards, numbered lists, etc. where the count of item is variable and it intends to give you flexibility to add as many as you want.
- Audio/Video File upload
- Any assets other than PDF documents under 10mb are to be externally hosted and linked as a URL
2. Exporting Data from WordPress as CSV
WordPress natively only allows you to export content as XML. So, to generate a CSV for your data, you’ll need to use a 3rd party plugin.
One reliable plugin to export WordPress data in CSV is WP All Import.
Once you install it, you can generate CSV files with fields of your choice from the database and download it.
Though, if you’re not used to the field naming, and have a couple of custom post types to be exported, the process of identifying the correct database fields can get fairly complicated.
There’s no one definitive guide to help you with it. You’ll have to go by instinct and trial-and-error looking at the name of the field, and determining whether that’s the correct one or not.
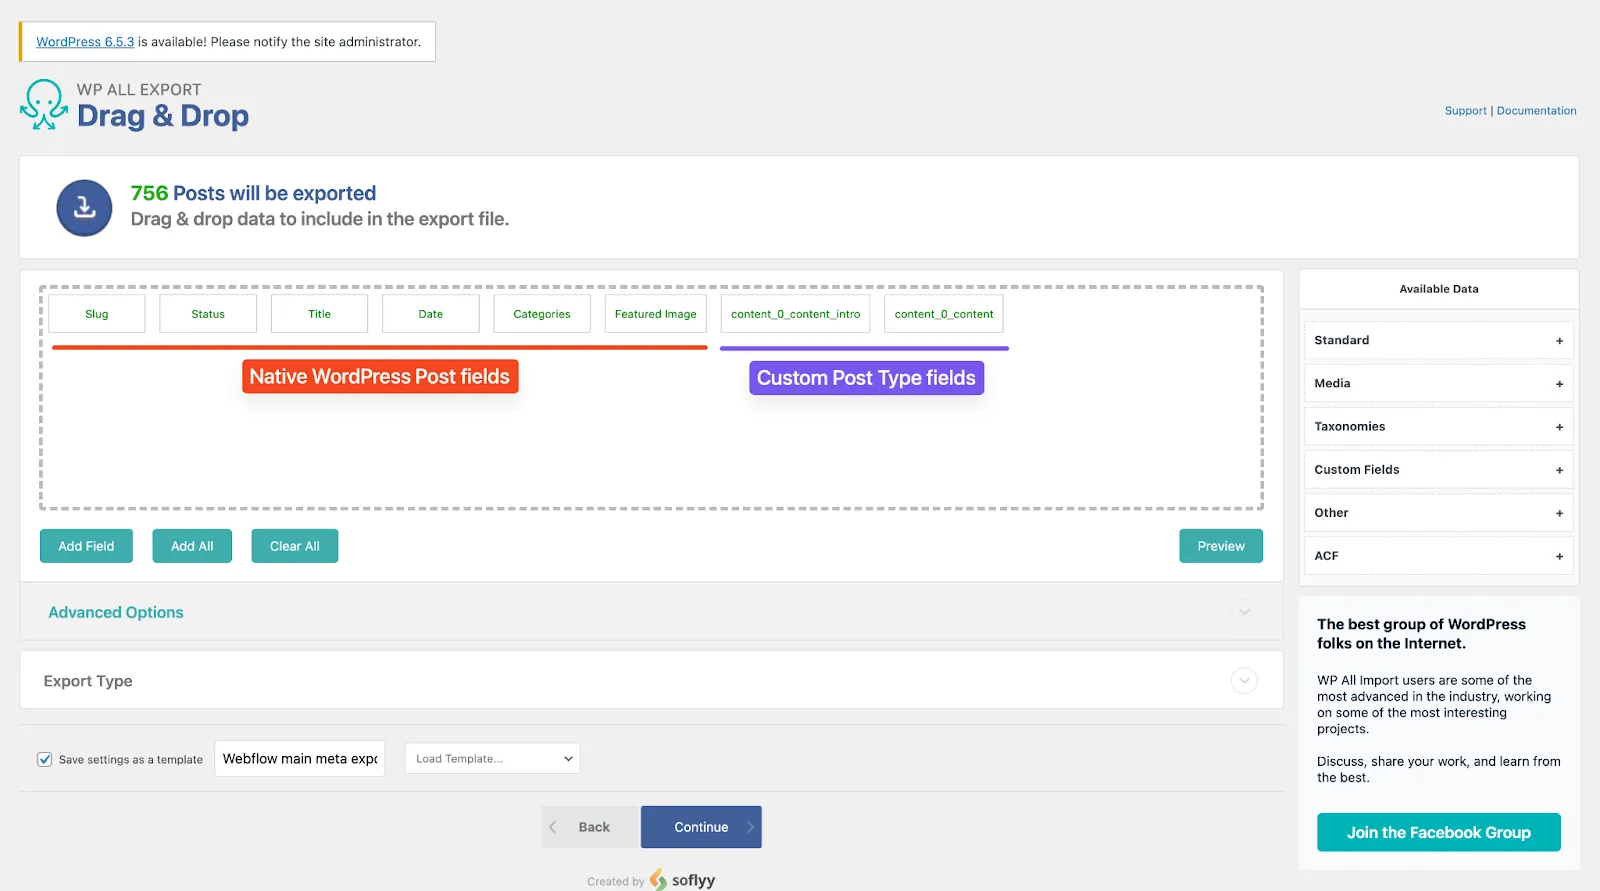
The WP All Import plugin does provide a “Preview” option after adding in fields, which shows you recent data for those fields from the WordPress database before export.

There are some videos and articles online that can help you navigate and export content using the WP All Import plugin.
If you’re using any other plugin to export from WordPress as CSV, the interface, details, and steps for that will differ accordingly
3. Creating CMS setup in Webflow with respective fields
Before being able to import the content, the very first requirement is to create CMS Collections (databases) for your data chunks (Post Types).
This won’t necessarily translate to an exact 1-1 copy of your WordPress CPT setup.
Example - “Posts” from WordPress has Categories and Tags features inbuilt, but in Webflow, you’ll need to create separate CMS Collections for Posts, Categories, and Tags and reference the Categories and Tags fields from Posts.
You can either pre-create CMS Collection fields too if you know all the fields and their field types it can translate to (can be done with the help of your export), or the Webflow interface will allow you to create new fields for the CMS Collection on the fly when you import the CSV data.
CMS Reference fields
If you’re migrating data into collections where the data is supposed to be a dynamic and recurring reference to another CMS Collection (e.g: Categories and Tags for Posts), your fields will need to be in the following format:
- Single Reference field - field value shall be the slug of the referenced CMS Item
- E.g: If you have a Category called “Next” whose slug is “next”, the import value in the Category cell for that Post should be next
- Multi-Reference field - field value shall be the slugs of referenced CMS item, separate by commas
- E.g: If you have Tags called “Editor’s Desk” with slug “editors-desk”, “Recommended” with slug “recommended” belonging to a post, the import value in the Tag cell should be
editors-desk; recommended
- E.g: If you have Tags called “Editor’s Desk” with slug “editors-desk”, “Recommended” with slug “recommended” belonging to a post, the import value in the Tag cell should be
Preparing the data for import
Importing of your data will need to happen in stages.
All your WordPress content won’t automatically go and set up by itself at once. It’ll require data formatting to alter your existing data in the format that Webflow supports for its fields.
Refer to this article from Webflow documentation to learn more about fields and their format support details.
Note: CSV import file for Webflow needs to be smaller than 4MB. If your export data is larger, break it down into separate files of smaller chunks.
Tip: A spreadsheet software like Google Sheets or Microsoft Excel will be of great help to format and alter the exported data to suit the required format for import. Also, you can greatly benefit from AI tools like ChatGPT to help you with the formulation to format your data.
(We prefer using Google Sheets since it is easy access, in the cloud, and has seamless AppScript integration to write and execute custom Javascript code and functions on data.)
Order of Importing
If you have data that is supposed to have references to other CMS collections, import those other CMS collections before this one.
Example - Categories and Tags CMS Collections should be imported before you import Posts, because Posts is supposed to refer to data from Categories and Tags, so those need to first exist to be linked; otherwise, the Posts import will fail.
Different content types, their support, and formatting
TinyMCE / Rich Text Content
This is your standard blog article or page content (text) where you have headings, bullet lists, formatting like bold and italics, blockquotes, etc.
WordPress doesn’t store paragraph tags in the database for rich text content. So, the export of rich text fields doesn’t contain HTML paragraphs. The content will still be in HTML format (links, images, bold, italics, etc. preserved), but the paragraph breaks will be standard line breaks (like the ones added by Enter keypress), as that is how they’re stored in the WP database.
WordPress formats paragraphs on the server on the fly using a function, so we will need to run our exported rich text content using that same function so that our end formatting is full HTML. If this is not done, no paragraphs will be preserved on importing into Webflow and all the paragraphs will merge (except when separated by headings/blockquotes).
Here’s the JavaScript version of the wpautop() function (that WordPress uses to generate paragraphs) - https://gist.github.com/ediamin/19ef0a4b0bff2dbfd7676c916d7dcd2a
You can run it in Google Sheets AppsScript, using it as a formula to reformat your exported rich text content in a new field.
Gutenberg Blocks Content
If using the Gutenberg editor, that adds most contents directly as HTML to your articles. There may still be some custom shortcode content in it.
Gutenberg HTML data, when imported as Code Embed, may be preserved by Webflow. The styling will still need to be manually added to either global code or in the Webflow GUI by creating those respective classes.
Shortcodes
If you were using plugins that give you the ability to add dynamic content (things besides standard text, images, tables), they’re likely added via shortcodes to your page/article content. Examples of that may be buttons, image galleries, etc.
Shortcode content will be imported as plain text and not the resulting dynamic data.
Depending on what your shortcode content is, you can run search/replace regex on your content from your import sheet to either just remove the text from the content, or replace it with some resulting HTML in Code Embed if it can be converted consistently.
Other options are:
- see if the functionality can be replicated by creating one or more additional fields in the Webflow Collection List (CMS database)
- let go of the shortcode functionality
WordPress Galleries in Articles
Since gallery images are added as shortcodes, your WordPress export will show gallery embeds as shortcodes containing IDs of images.
In Webflow, you can’t have a gallery of images within Rich Text content. It’ll either need to be individual images one after another, or a separate multi-image field.
To convert gallery shortcodes to image URLs and import them in either format is not straightforward. Here are the steps that it involves:
- Download a map of Media Library image attachment IDs and their respective URLs
- This can’t be done natively or with any plugins, so you’ll need to write and execute a custom PHP script that fetches this data from the database (WP_Query class) and download the map as a CSV
- Write and execute formulae for the following in your import sheet:
- Extracting comma separated gallery image attachment IDs out of the [gallery …] shortcode (using regex)
- Replace the IDs with the map of ID-URL data obtained in the previous step (by importing that CSV into your working import sheet; will need combination of functions like VLOOKUP, ARRAYFORMULA, TEXTJOIN)
- have them semicolon separated if you wish to add it in the multi-image Webflow field
- Put this new image URLs string into its respective column
- Replacing [gallery… ] shortcode with URLs if images needed in the rich text field
- Or putting the entire semi-colon separated image URLs string into a new multi-image field column
Tables
Tables are not supported by the Rich Text GUI in Webflow. They will need to be added as Code Embeds, and further edits to be done as HTML to preserve them.
Steps on how to do that are mentioned in the next subsection here.
Images
Any images (e.g: featured images) for an individual image field need to be set as URLs in your import file, and Webflow will automatically import them.
Note: The images need to be less than 4MBs otherwise they won’t be imported.
Multi-Image Gallery/Lightboxes (separate plugin content)
Any image gallery or lightboxes can be set up in a multi-image field in Webflow. Import format needs to be image URLs separated by semi-colons.
Up to 25 images are supported in a multi-image field.
Lightbox can be set up for the gallery images when designing the page.
PDF documents
PDFs cannot be programmatically imported.
For PDFs in a separate file field, those will need to be uploaded manually.
For PDF links in the article content, here’s what you can do:
- Find and create a list of all PDF link sources on your WordPress site
- Doable by using regex to extract .pdf links from your article content in the import sheet
- Download all the PDFs to your computer using your OS CLI
- Terminal utilities like wget or curl can be used to bulk download files from the given URLs
- Compress if needed and upload them to the Webflow Assets area
- Files need to be under 10MB
- Copy all the Webflow asset links one-by-one to create a map of old PDF links with new
- Replace the old links with new in the content
- Can be done using spreadsheet formulae
Audio/Video files
Webflow doesn’t allow hosting of audio/video files in CMS. The only video upload feature is for background videos and that has a max limit of 30MBs. That can be used in a way to host videos on Webflow and replace the links, but those videos need to be published on the site for them to be active, and there are other complications.
A better bet is to host audio and video on external platforms.
Webflow has a Video CMS field supporting Youtube and Vimeo. Other sources will need to be added as a URL field in the CMS with manual code to wrap it in a <video> tag on the frontend.
To privately host videos, Vimeo is often the preferred choice. Other options include services like Wistia (though that integration will require custom code embed with the player), or CDNs like BunnyCDN, Cloudflare Stream, etc.
Article Excerpts
If your design has article excerpts to be shown (common for blog posts list page), this is another thing that WordPress handles dynamically on the server. To show excerpts on your Webflow site, you’ll need to create a new field in the CMS Collection for excerpts, and pre-generate excerpts using formulas in Google Sheets / Microsoft Excel.
Depending on how much content you want to show, your formula can differ, and you’ll also need to clean up HTML tags from the rich text to show the excerpts as plain text.
Note: Directly outputting the entire article’s rich text on the Webflow site hiding the remaining content using CSS is a big no-no because it’ll create duplicate content (SEO issue).
Here’s what a Google Sheets AppScript function for generating excerpts and cleaning up HTML can look like:
/**
* Returns 50 words of article summary
*/
function getArticleSummaryInWords(htmlContent) {
// Remove HTML tags
var textContent = htmlContent.replace(/<[^>]+>/g, '');
// Split text into words
var words = textContent.split(/\s+/);
// Take the first 50 words
var wordCount = words.slice(0, 50).join(' ');
return wordCount;
}
You can run the above function as a formula on your rich text content to generate summary text.
Note: This means that excerpts for new future CMS items cannot be auto-generated and will need to be manually inputted, unless you run some no-code workflow on item publish (using Make or a similar tool) that runs similar code and auto-updates the excerpts.
If you don’t want to go through this route, then excerpts will need to be removed from the site.
Other Gotchas
There are unsupported content types/HTML tags like line dividers that won’t natively work in Webflow. Although it won’t break your import, the line breaks and any unsupported HTML elements will be stripped out and removed from the article.
These too can be converted to Code Embeds to preserve them.
Example - From our experience, Webflow seems to strip out line divider tags (<hr>) entirely even when added as Code Embeds. In such a case, there’s no other way to programmatically import such content.
Importing content as Code Embeds in Webflow
A frequently occurring use case of HTML content that is not natively supported in Webflow is tables.
To support those, you’ll need to add them as Code Embeds for them to preserve their styling in Webflow.
To do that, run a function in your import sheet that wraps your table HTML within <div data-rt-embed-type='true'></div>
So, your end table markup within the HTML content should look like:
```
<p>some content</p>
<div data-rt-embed-type='true'>
<table>
<tbody>
<!-- table html content →
</tbody>
</table>
</div>
<p>following content</p>
```
This shall import the tables and preserve them in Webflow.
Note - The table (or any custom code content) styling will need to be manually set in Webflow either via GUI or custom CSS as we’re only importing data. That doesn’t import the elements' styling.
Also, further edits of the table (or any Code Embed content) will need to be done as HTML as there are no GUI provisions for those elements within Webflow.
5. Run the import
Fairly straightforward:
- Export the individual import sheet as a CSV file, the current one for the Collection that you want to import
- Remember that max import file size is 4MBs, so divide the prepared data into multiple sheets if needed
- Open your CMS Collection in Webflow where you want to import the data
- Click the Import button
- Drag and drop your prepared CSV data sheet
- Map the fields
- check the right side preview to confirm data parity
- Run the import
Tip: Have your import CSV column name match the field names (exactly; case-insensitive) so that Webflow can automatically map the fields when you add your CSV sheet for import.
Tip: It’s always beneficial to take a backup of your Webflow project when offered before data import, as a precautionary measure.
Note: If you have existing CMS Items that you want to replace on re-import, have the “Item ID” field in your import sheet, and get them to match the Item IDs of the respective Webflow items. This way, Webflow will offer an option to replace existing CMS items.
Fixing any import issues
Some rows may be skipped if there are formatting issues with its content, or if the data is not as expected (e.g: incorrect CMS reference field value). In case of errors, Webflow will provide an error message along with a log of items that were skipped and its reason.
If the reason is missing, try re-importing that item. If it still fails, look into its content format to confirm.
If nothing works, it’ll need to be added manually.
5.a. Manually fixing/facilitating unsupported content types
The details about all different types of content data, their support in Webflow, and alternative solutions are mentioned above (here). Anything from that list which doesn’t work out programmatically in your case will need to be added manually. Or opt for either dropping that feature, or making an alternative tradeoff.
6. URL permalink parity and management
WordPress can accommodate any form of complex URL paths, including dynamic data in the path URLs.
Webflow only supports a consistent static folder based structure without any possibilities of path overlaps between static and dynamic pages.
So, it's a common requirement to set up 301 redirects for your WordPress URLs when migrating to Webflow.
This does affect SEO temporarily, and if done correctly, things should be back to usual in a few months.
A common example is a blog path with year/month/date permalink folder structure.
For instance - example.com/blog/2024/06/01/article-slug
You cannot have such a permalink in Webflow. So, the closest possible redirect would be example.com/blog/article-slug
Note: It’s currently not possible to do 302 temporary redirects in Webflow
Clashing URL paths
Continuing from the above example, say if you want a main blog archive (list) page on example.com/blog, you can have the CMS structure path also having /blog path. But you then cannot have any other static subpages or subfolders under /blog like /blog/category/{{category-name}}, /blog/popular, etc.
In case you have any such URLs, you’ll need to create new URL paths for them and set up the respective 301 redirects.
301 redirects
Webflow provides a straightforward interface for setting up 301 redirects in the project settings area. Learn more about redirects here from this Webflow university article.
- For 1-1 redirects, you just need the source and destination path.
- For wildcards (redirecting a pattern of URLs programmatically), guidelines are given in the Webflow University article.
A use case for wildcards would be the aforementioned example of dynamic blog path, whose redirect setup in Webflow would look like:
- Source: /blog/(.*)/(.*)/(.*)/(.*)
- Destination: /blog/%4
If you don’t want to risk URLs that may match a similar global pattern of 4-level nesting but are not supposed to be redirected to the blog, one way to approach it is to create separate redirect entries for each year subfolder that we have the blog articles for. Like:
- /blog/2019/(.*)/(.*)/(.*) -> /blog/%3
- /blog/2020/(.*)/(.*)/(.*) -> /blog/%3
and so on…
Note: Webflow’s redirect regex isn’t the standard regex but a custom syntax, only allowing a catch-all pattern. There’s no provision to define complex regex to target numbers and specific patterns.
Tip: For adding bulk redirects, prepare a spreadsheet with 2 columns - old and new (relative paths; without the hostname), export it as CSV, and use Finsweet’s browser extension to upload the CSV, which will add all the redirects at once.
Custom functionalities, i.e. plugins and theme features
An average WordPress site has ~25 plugins installed! This shows that WordPress, in its native barebones form, isn’t sufficient as a platform to build an organisation’s production-grade website.
It’s similar to how smartphones are incomplete and not as usable on a day-to-day basis without any apps.
Being the core pillars of WordPress’ extensibility, these are what add most of the feature set that help make your WordPress site the way it is. From caching, to social sharing icons, analytics code, SEO, forms, image optimisation, popups, and more..
But, not all plugin and theme functionalities from WordPress may be directly replicable in Webflow as-is, or perhaps even needed to be replicated! Webflow is natively packed with a bunch of the core features needed to launch a production-grade modern website.
Note: There are nuances to feature-set, and you won’t get exact feature parity in most cases. Separate plugins and services are specialised, and usually offer more bells and whistles than natively implemented features on a platform like Webflow. That said, the equally important part is to determine whether you actually need those extra features or is the native functionality sufficient.
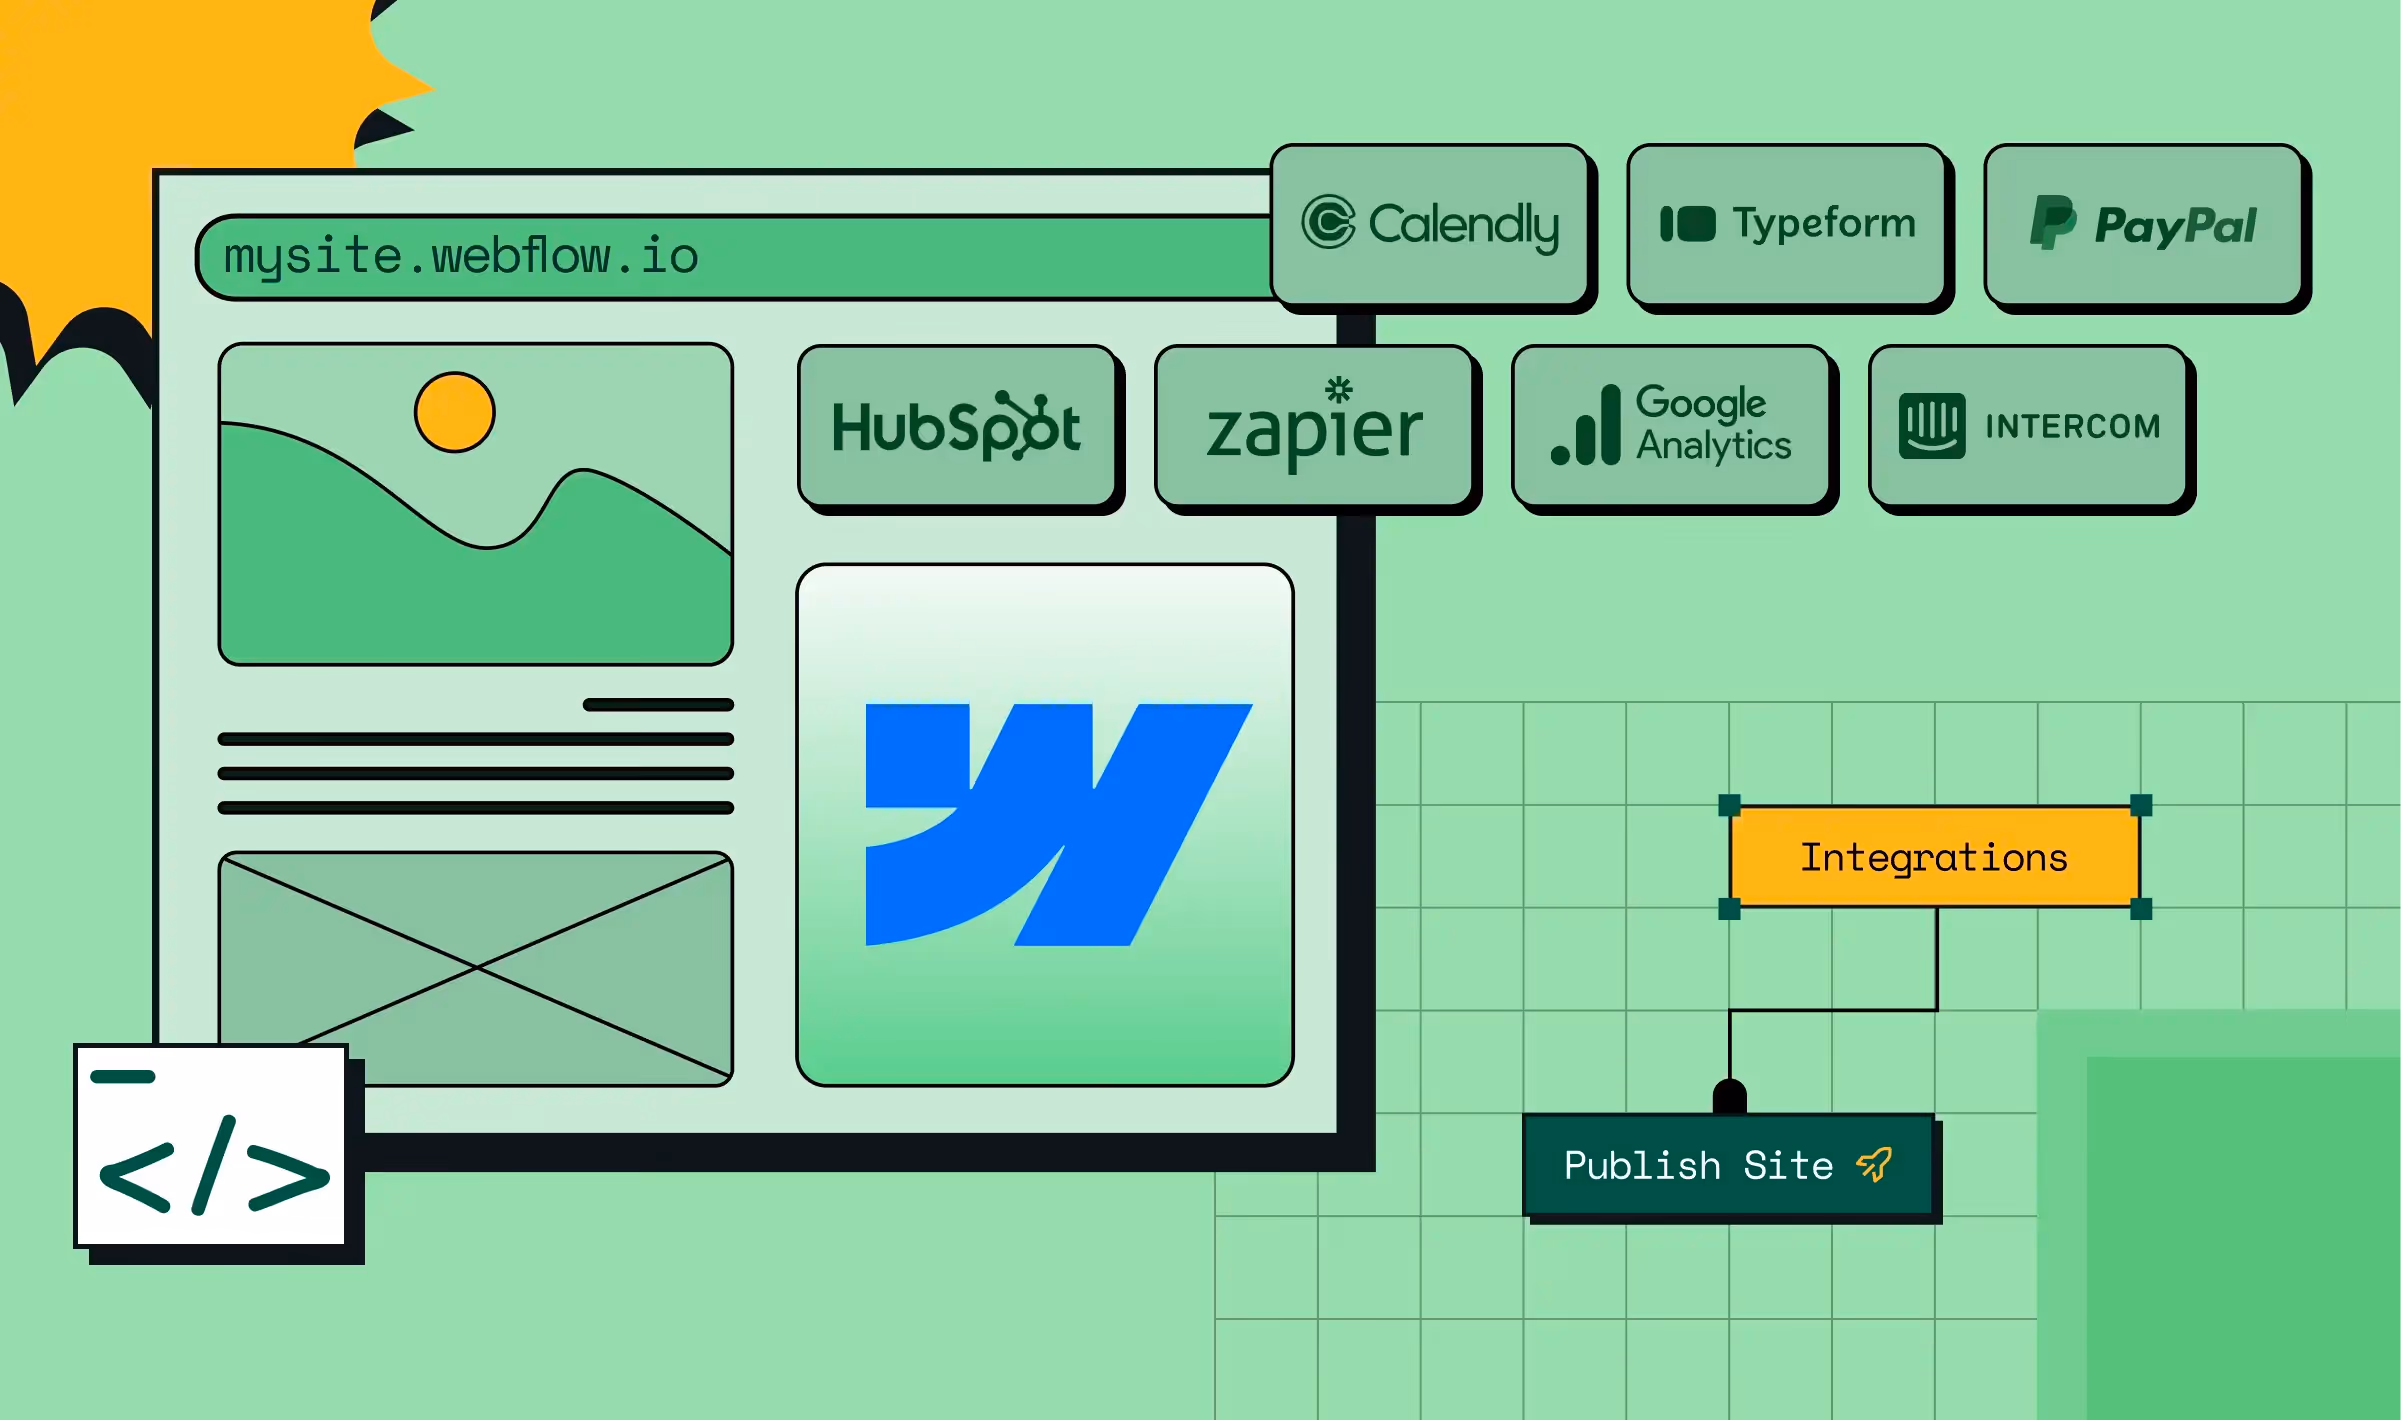
Some of the most popular plugins that are required/used on most WordPress site come as native platform features in Webflow. This includes:
- Security, firewall, malware protection, login limitation plugins
- E.g: WordFence, Sucuri, Limit Login Attempts
- Technical SEO
- E.g: Yoast, Rank Math, All In One SEO
- Caching
- E.g: WP Super Cache, WP Total Cache, Lightspeed Cache, WP Rocket
- Forms
- E.g: Contact Form 7, Ninja Forms, WP Forms, Gravity Forms
- Form spam control
- E.g: Akismet, Advanced Google reCAPTCHA
- Image Optimization
- E.g: WP Smush, Shortpixel, Kraken, Optimole, Imagify
- Page Builder/Designer
- E.g: Elementor, Bricks, Oxygen, Gutenberg add-ons
- Popups Builder
- E.g: Optin Monster, Icegram
- Translation/Localization
- E.g: WPML, TranslatePress
- Page Redirects
- E.g: Redirection
You’d notice a pattern in these - the most fundamental aspects of a website are covered natively by Webflow; most offered as a part of their hosting package without any extra costs. Whereas, although most WordPress plugins have free versions, they usually run on a freemium model, and the bills for anything beyond the basics start raking up pretty quickly.
Comments system
Unlike WordPress, Webflow doesn’t come with a commenting system. So, you’d have to opt for a 3rd party tool like Disqus to add comments to your Webflow blog.
Migrating native WordPress comments to Disqus is easy using their WordPress plugin.
E-commerce
Most e-commerce sites on WordPress run on WooCommerce, and that comes with an ecosystem of plugins of its own.
Although Webflow provides e-commerce functionality inbuilt, it has its own limitations. It may easily match the core feature set of WooCommerce, but anything that you add using WooCommerce add-ons, is likely not possible natively with Webflow.
WordPress Plugin features in Webflow and their limitations
Native implementation of features on a platform comes with trade-offs. They’ll never be in full feature-parity with custom 3rd party specialised solutions.
In a case where you need more than what Webflow natively offers, you can always look to incorporate similar 3rd party alternative solutions that can help you get what you need. These would usually be SaaS tools that come with a monthly subscription of their own.
Below are some examples of commonly needed features on a website, their Webflow native equivalent and limitations, and some potential alternative softwares to replace that feature-set.
Image Optimization
Image Optimisation, although a 1-click native feature in Webflow (for both static page assets and CMS images), is a core-functionality implementation.
It does not address advanced fine-tuning. Things like:
- Auto-compressing newer image uploads
- Periodic auto-compress
- Image Resizing
If you want those automation and resizing features, you can set up some 3rd party service like Pixie or Optily. They have their own trade-offs, but do the job well.
Forms
Webflow Forms are very powerful and flexible with total control over design and setup, but there are a fair number of nuanced limitations if/when you need complex setups on production sites.
For starters, Webflow forms only support capturing text data and files, and does not allow for features like payments, signature, etc. File upload limit is 10MB. If you’re looking for anything beyond text data capturing, you’d need to use a 3rd party form tool like Jotform, Tally, Typeform, etc.
If you want to build conditional fields, multi-step form, quizzes and/or anything involving live and dynamic calculations, it may or may not be possible using 3rd party JS library extensions. There are several of them like:
The choice of the ideal library/external form tool depends on the requirements and acceptable trade-offs.
Then there are some other limitations or potentially unexpected behaviors to note, like:
- No separate access control for non-admin team members to view form submissions
- Checkbox values from the same group being recorded as separate column values
- Cannot send per-form custom email notification receipt to the form submitter
Tip: Webflow forms data can be connected and sent to other softwares using data automation tools like Zapier, Make, etc.
Popup Builders
With the help of standard HTML structure and IX2, you can easily build modals/popups in Webflow. It doesn’t require any special separate tools. Combine it with Webflow Forms and you can have custom lead magnet popups of any kind.
If you’re looking for a dynamic lead magnet system like auto-triggering popups on a timer, specific repeated page visit, time of day, etc., that is possible to achieve by writing custom JS that facilitates the requirement.
If you want analytics for your popups to measure their effectiveness, you can potentially integrate the trigger of the popup with Google Analytics or any event-driven analytics tracking software.
So, for popups, it is possible to build and meet the majority of the complex features natively in Webflow.
Now you have a complete roadmap to carry out your WordPress to Webflow migration. Need help? Talk to us and we will get our best Webflow experts to assist you!


.webp)
Browse Similar Articles


How to Choose the Best B2B Website Maintenance Company: 9 Questions to Ask Before You Hire One

.svg)


How to Use Brand Storytelling on Your Website to Close More B2B Deals and Build Buyer Trust


Why Partnering with a B2B Brand Positioning Agency Accelerates Market Differentiation


.avif)

10 Product Marketing Companies Powering the Fastest-Growing SaaS Brands in 2026


Outsourcing Web Design: Cost-Benefit Analysis for Mid-Market & Enterprise Brands

From Leads to Lifetime Value: How Growth Marketing Agencies Scale SaaS Revenue


Webflow vs WordPress: Which Platform Is Better for Your Business Website in 2026?


Fintech Web Design That Builds Trust: 8 UX Principles Every Fintech Site Needs


Optimizing for Intent: How B2B Website Messaging and UX Changes Help Capture Top-Funnel Buyers


From Audit to Action: 8-Step Process to Optimize Your B2B Website Strategy for 2026 Buyers


How to Design a High-Converting Landing Page from Scratch (2026 Edition)


How to Optimize a Landing Page for Maximum ROI: A Step-by-Step Breakdown


AI Landing Pages That Convert: 7 Design Principles Every AI Platform Should Follow


Top 7 Webflow Integrations to Supercharge Your Website's Performance and Conversions


10 Best Web Design and Development Companies in India [B2B Focused for 2026!]


How to Choose the Best Webflow Agency: A Complete Guide for Your Business


Levels of Customer Awareness: How Slack's Evolving Messaging Strategy Matches User Awareness Stages: A Study


Decoding The Above the Folds (ATF) Of 100 SaaS Brands [Backed by research]
.avif)


Interested in seeing what we can do for your website?


.webp)
